This is the second article in our three-part series that will help you manage your data smarter with 12d Synergy. Join Tim Brooks – a civil designer with 21 years’ experience – as he walks you through easy-to-follow videos on the basics of data management with 12d Synergy.
New to 12d Synergy? Check out our complete training series teaching you everything from Collaboration in 12d Synergy to Client Links, Publishing and Issue.
After completing part 2, you’ll be able to seamlessly integrate your 12d Model data with 12d Synergy. But what exactly is 12d Model and what’s its relation with 12d Synergy? Great question!
12d Model is a comprehensive 3D engineering and surveying package used on thousands of projects worldwide. It seamlessly works alongside 12d Synergy to manage your Project with proficient security.
Creating and Opening a 12d Model Project in 12d Synergy
Within 12d Synergy, 12d Model Projects are distinguished in green text on your job tree (vertical menu of jobs and folders to your left).
To create a 12d Model project, simply navigate to the folder where you wish to create the project, right click the folder, hover over New and select New 12d model Project.
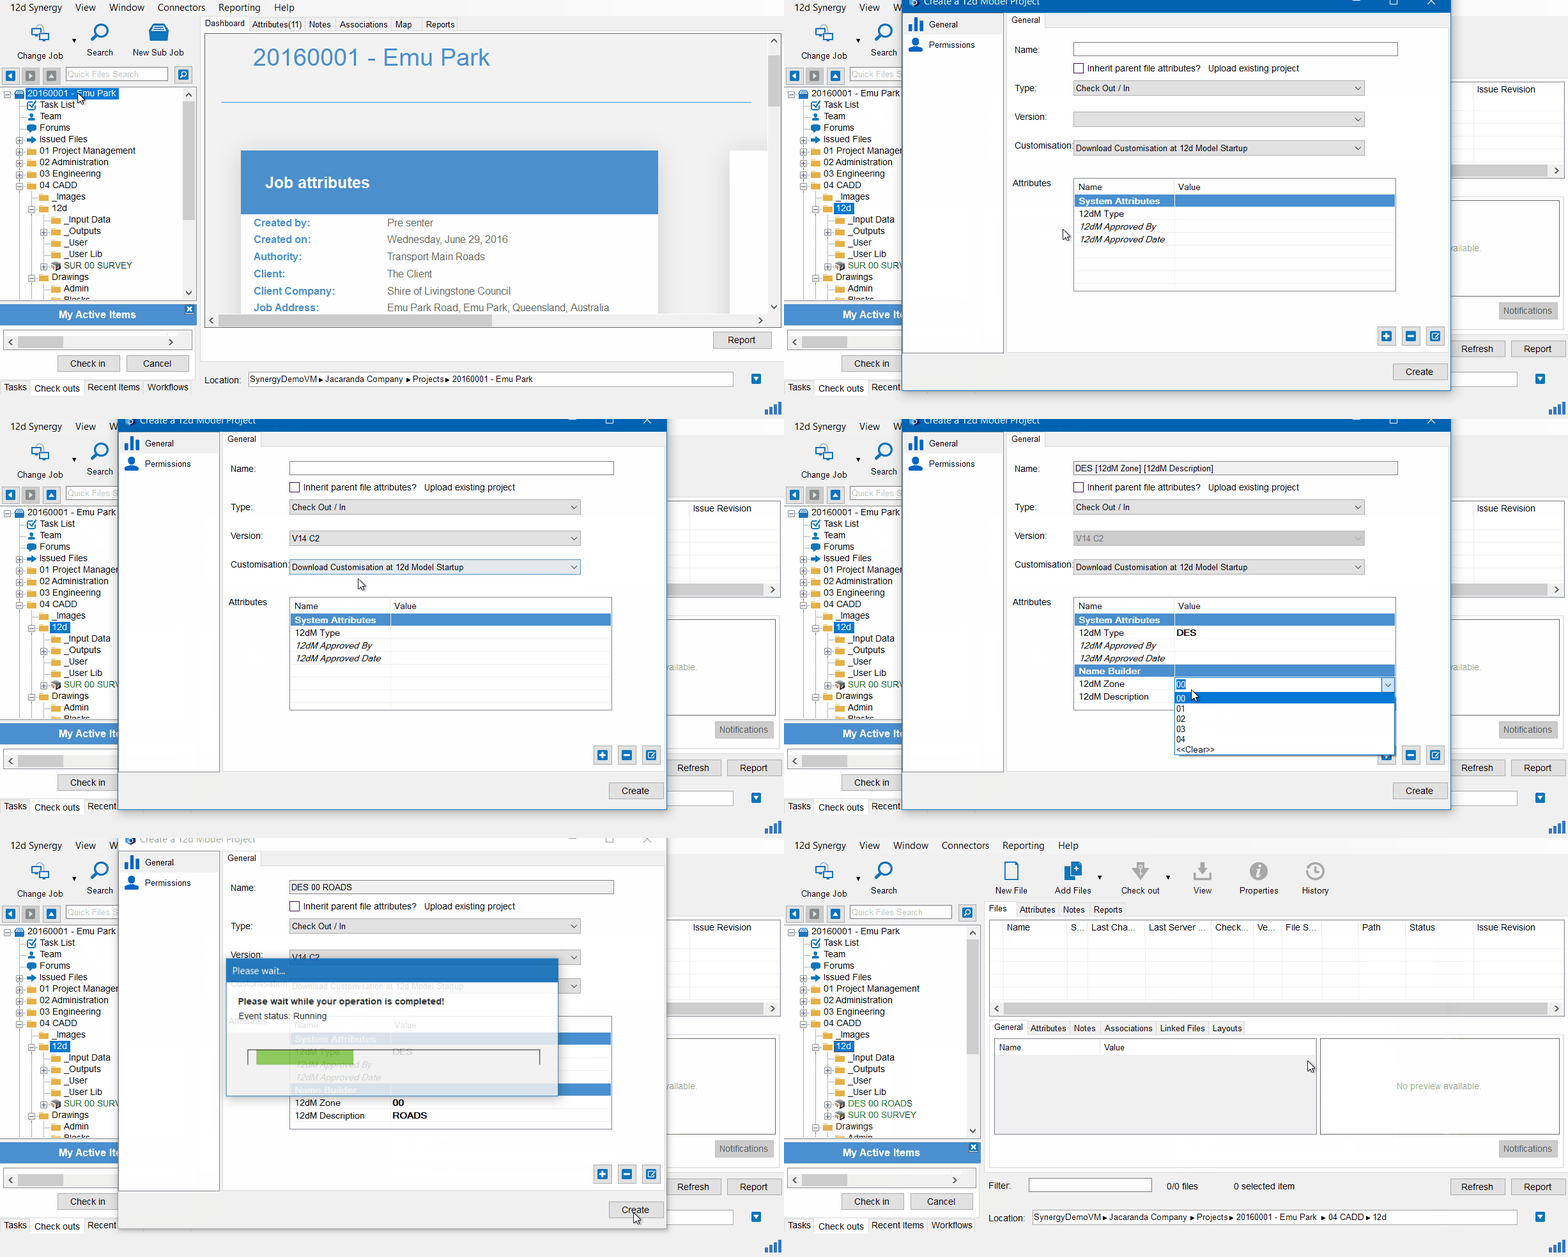
Then type in the name and select the version and customisations.
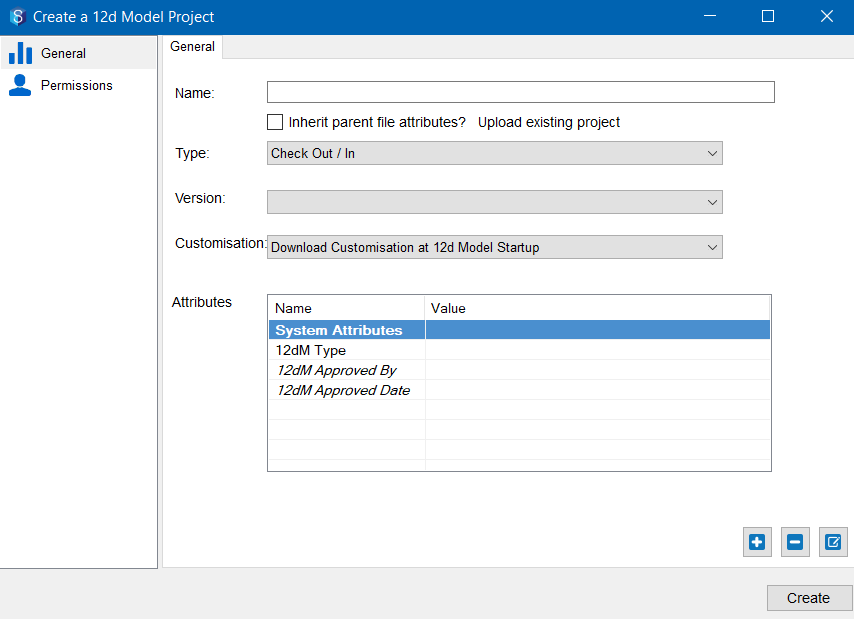
If you have an existing project inside a local or network drive, you can drag and drop it into 12d Synergy.
To open a 12d Model project, simply check it out or select the Open icon with the 12d Model logo in the ribbon bar.
When checking back in, simply find the Check In icon in the ribbon bar. Similar to a Managed Folder, you can see what’s been changed and added.
The other way is from 12d Model itself, by going to the Project drop-down menu in the top left-hand corner, and selecting Check In.
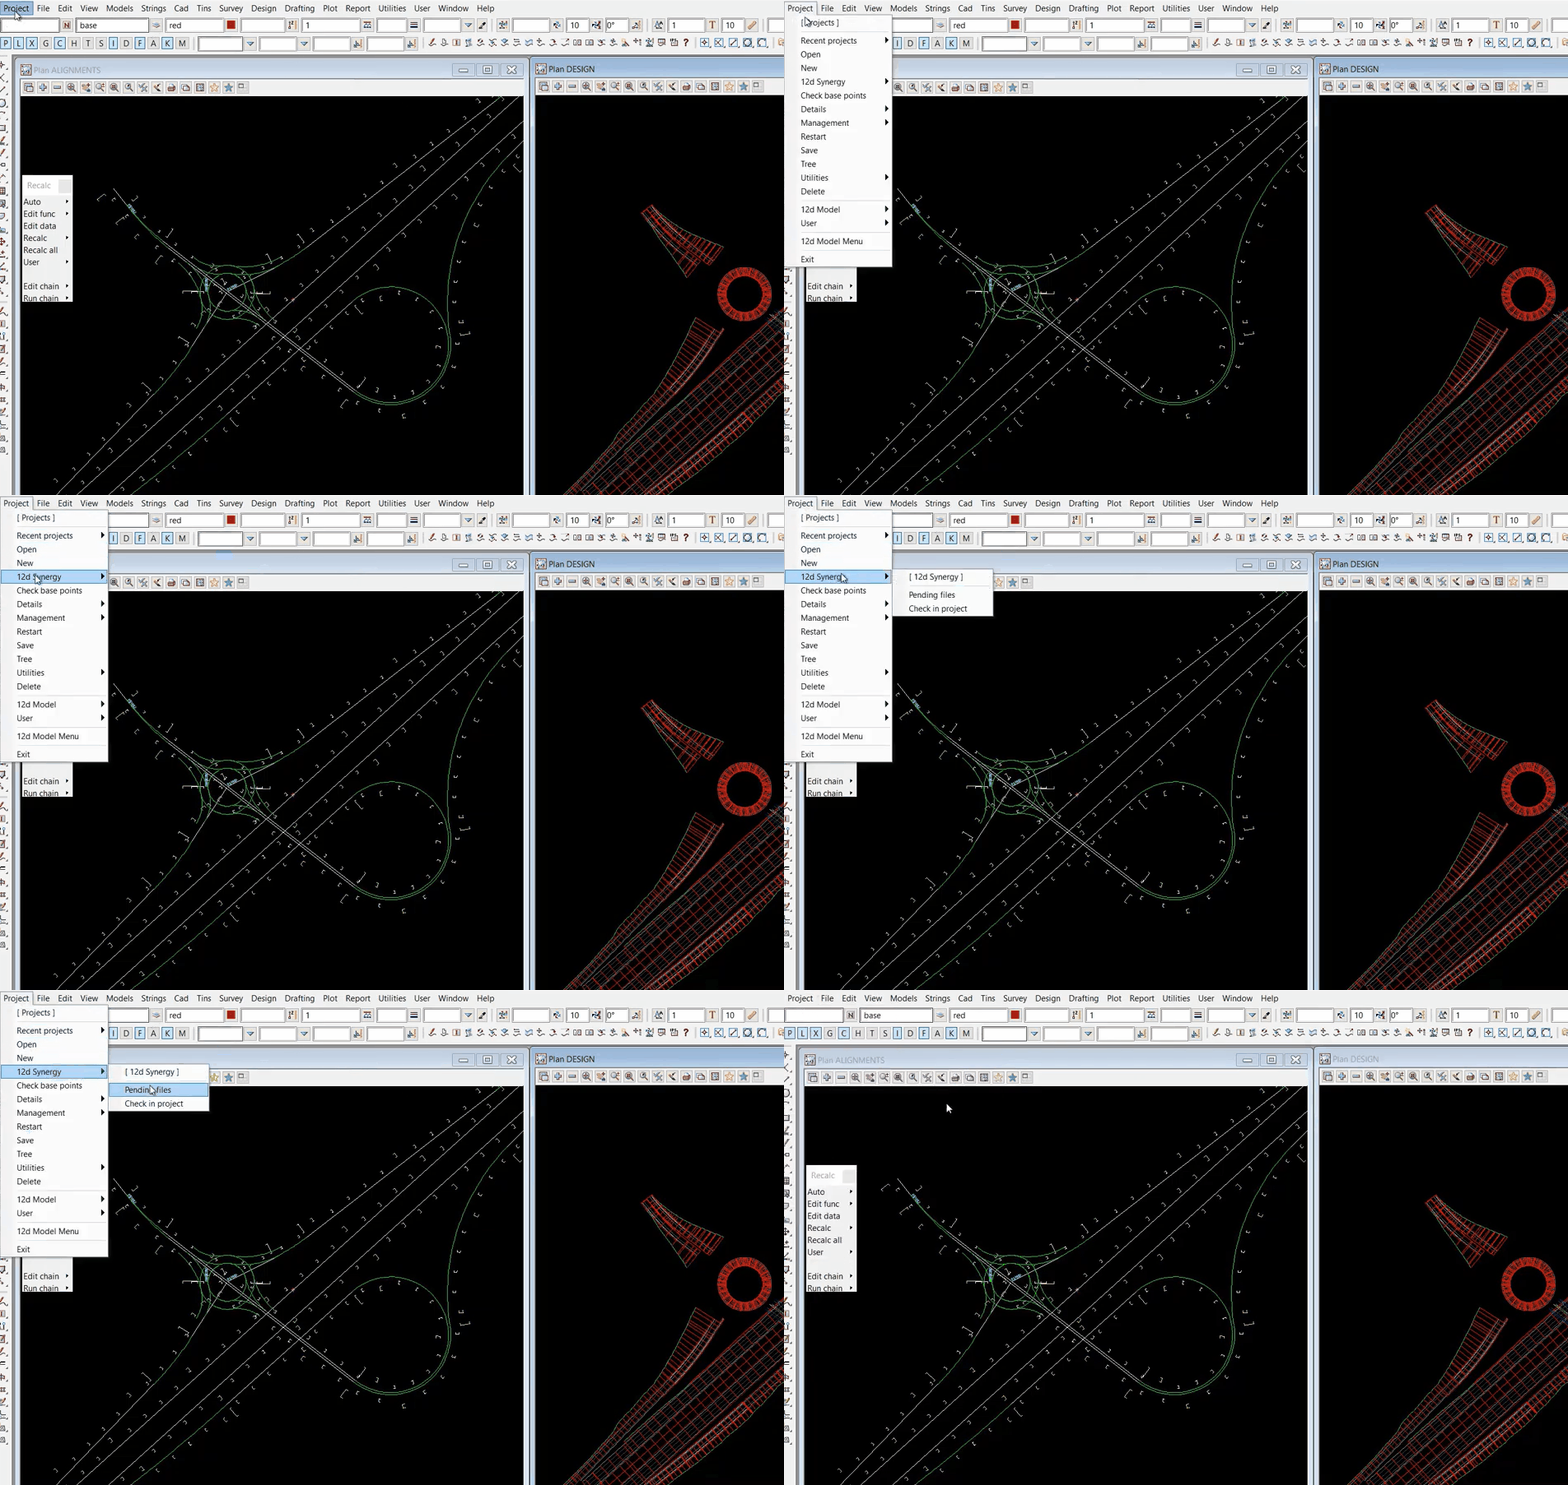
Pro Tip: In 12d Synergy Version 4, you can also check out multiple projects at once by clicking the drop-down menu next to Check Out, giving you the option to ‘Check out many’. Browse through your projects and select the ones you wish to edit at a particular time. Likewise, you can check in multiple projects.
Jump to (8:35) in the video tutorial to explore more about customising your properties when creating or opening a 12d Model Project.
Sharing Projects in 12d Model and 12d Synergy
Geospatial data is overseen, edited and transferred through numerous hands – projects can very quickly become a grocery list of untraceable updates.
This makes it essential to have a controlled sharing environment.
To share a 12d Model Project with other users, select Project in the top left-hand corner ribbon bar, hover over Management and select Sharing.
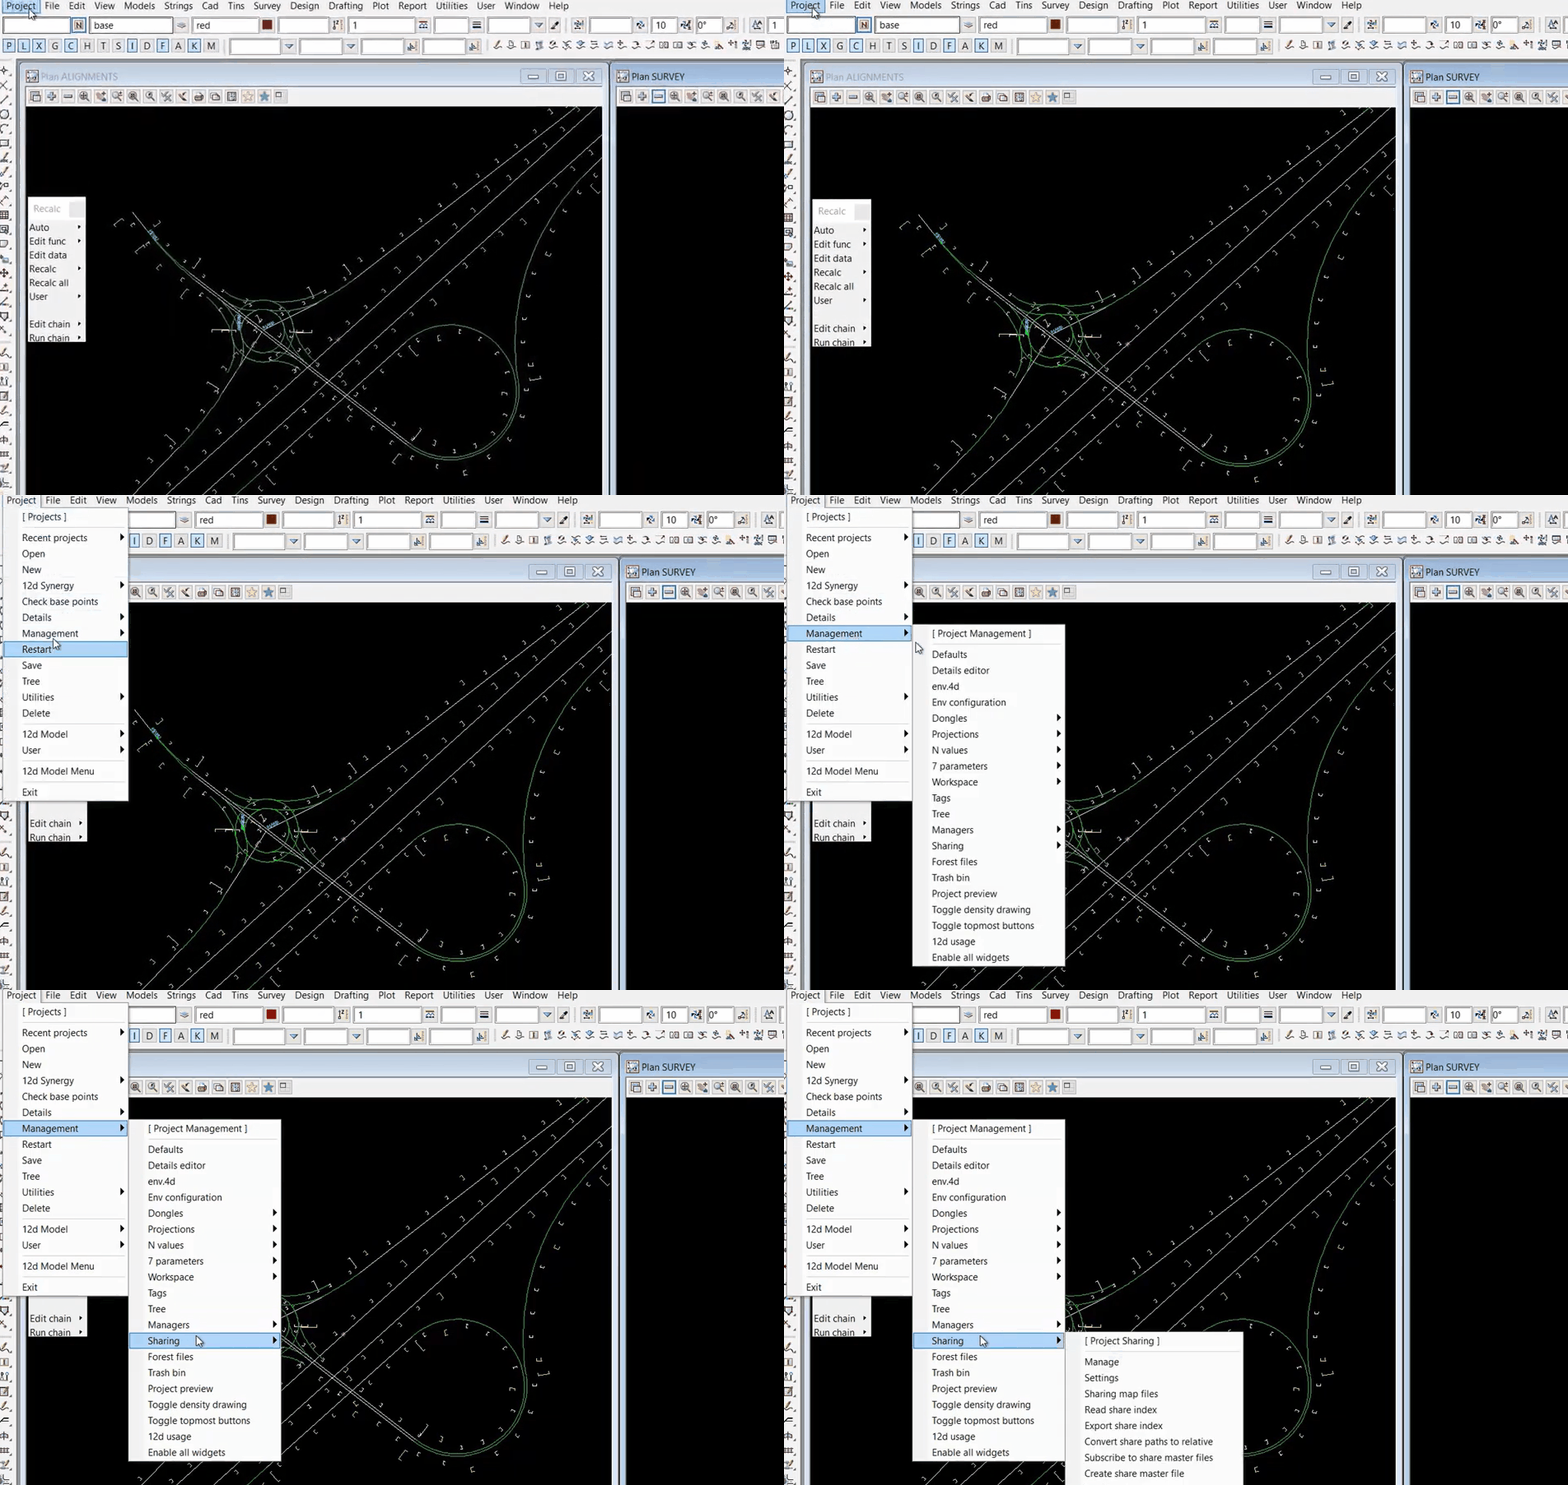
Alternatively, you can share via the Sharing Manager (Select View in the ribbon bar, tick the sharing option). (12:54)
To select Models or Tins from another project, simply select New Project in the Share Management panel. (13:09)
Select your project, and then it will be added to the Share Management tree where you can choose the models you wish to share. You can do the same with Tins.
Shortcut: In 12d Synergy, simply right click the 12d Model Project and select Edit, then select Sharing.
Controlling 12d Model and 12d Synergy Permissions
Permission controls (16:17) involve managing the user access of different projects to ensure secure and controlled data – it’s like having a personal security guard protecting your project.
Select Permissions in the Edit panel (above Sharing). Here, you can apply permissions through User, Groups and Roles – for example, adding the ‘Design’ group in.
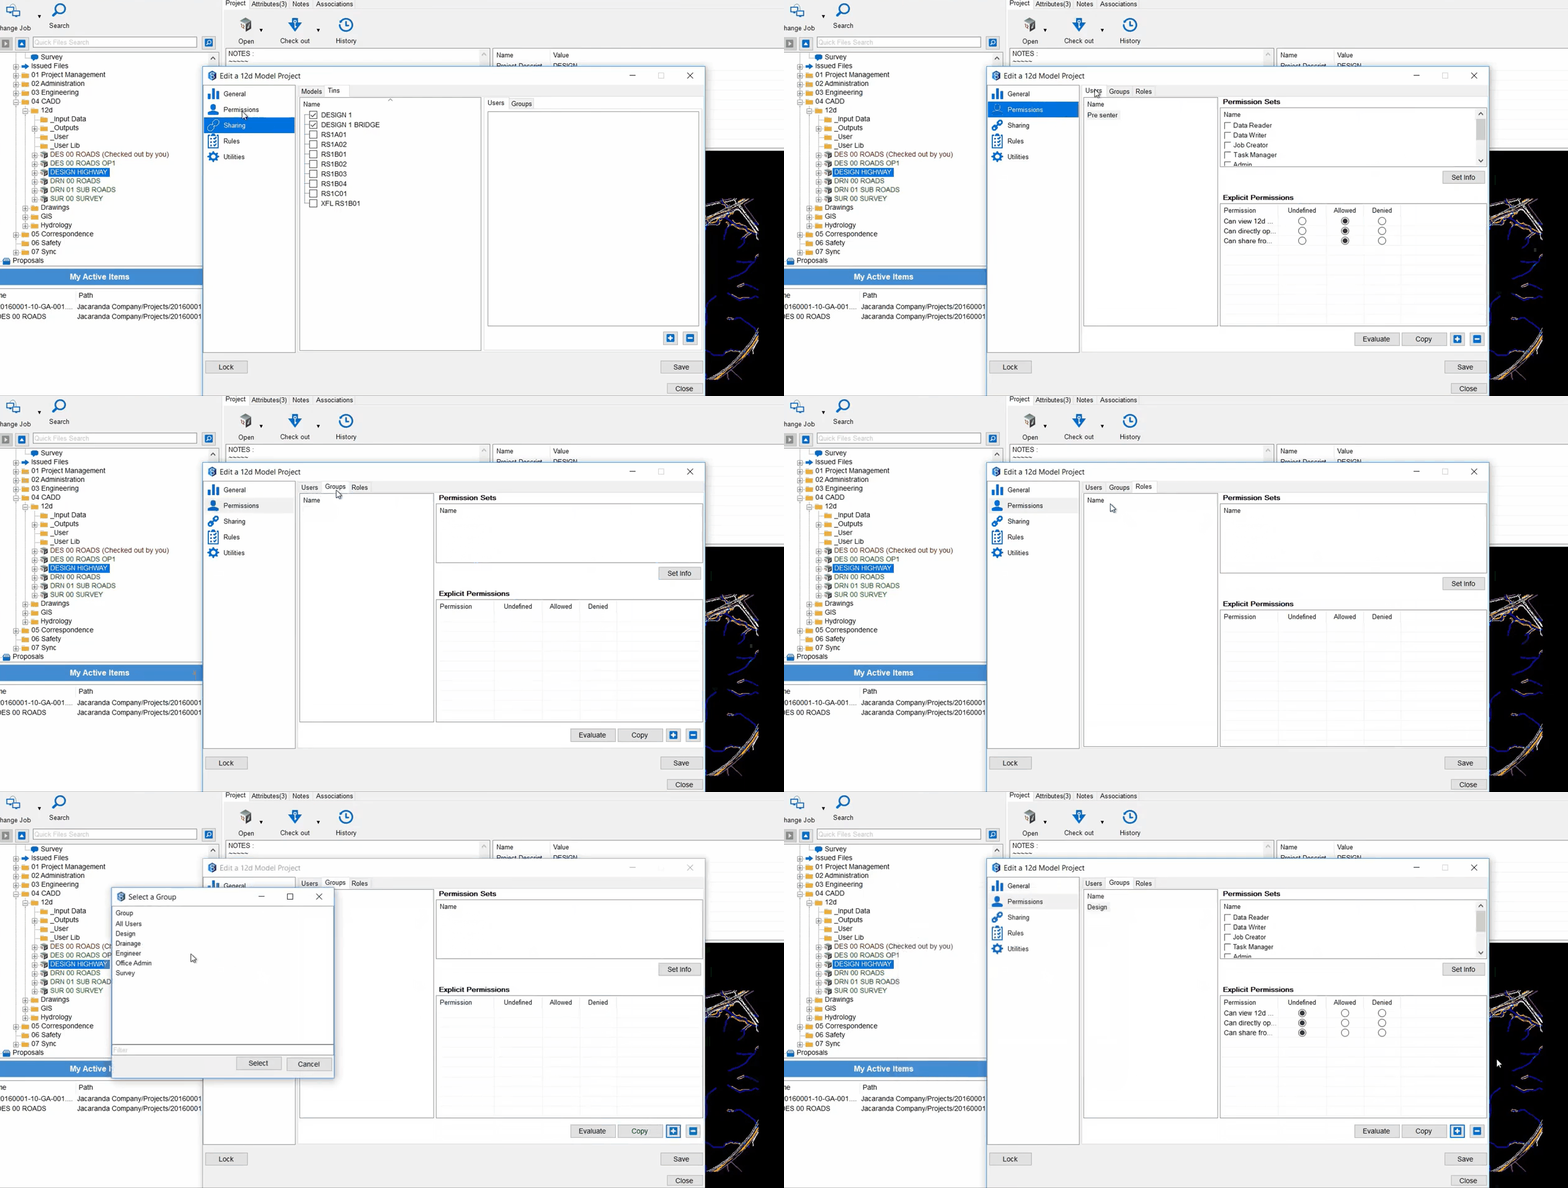
You can enable permissions on three levels, being able to View the project, Directly Open and edit, and Share the project. Note: If you create a Project, you automatically have full permission of it.

Using the 12d Synergy Offline Mode with 12d Model
Scenario: You’re spending the week in a remote office with limited internet accessibility.
Issue: You can’t connect to your 12d Synergy server and therefore can’t work on your 12d Model Project.
Never fear – You have the 12d Synergy Offline feature.
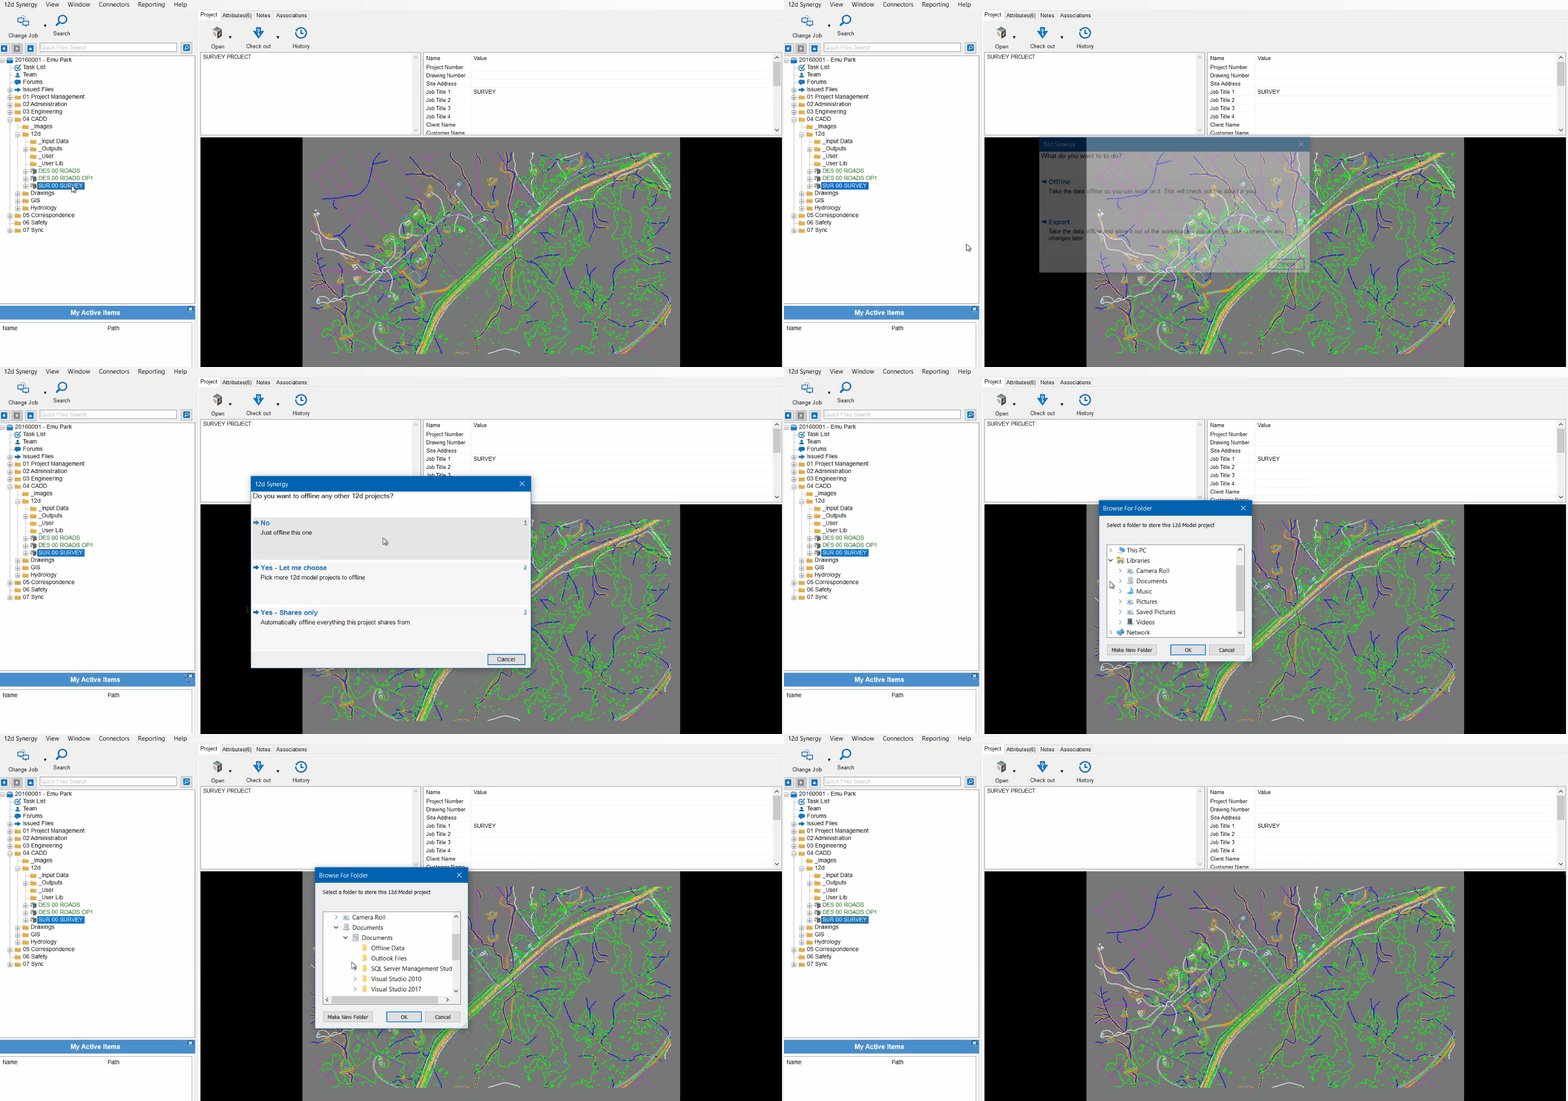
You can master every step of our Offline Data Mode here.
Simply right click on your project, hover over Data Out and select Offline/Export.
12d Synergy will then ask you where you want to put your project, and if you want to take your Set-Ups.
You can now exit out of 12d Synergy and safely work on your project offline.
To bring something back online, simply re-launch 12d Synergy, right click the project and select Online. This will copy all the offline updates in your workspace, and safely store these changes once you’ve checked it back in.
Accessing 12d Model Project History and Rollback with 12d Synergy
No need for Doc’s DeLorean to find previous 12d Model Projects. As with all data and documents in 12d Synergy, you can access the entire change history of 12d Model Projects.
You can also rollback to previous Project versions and see who made a change, when and why.
Simply select the History icon in the ribbon bar to view all the previous changes and open the History panel.
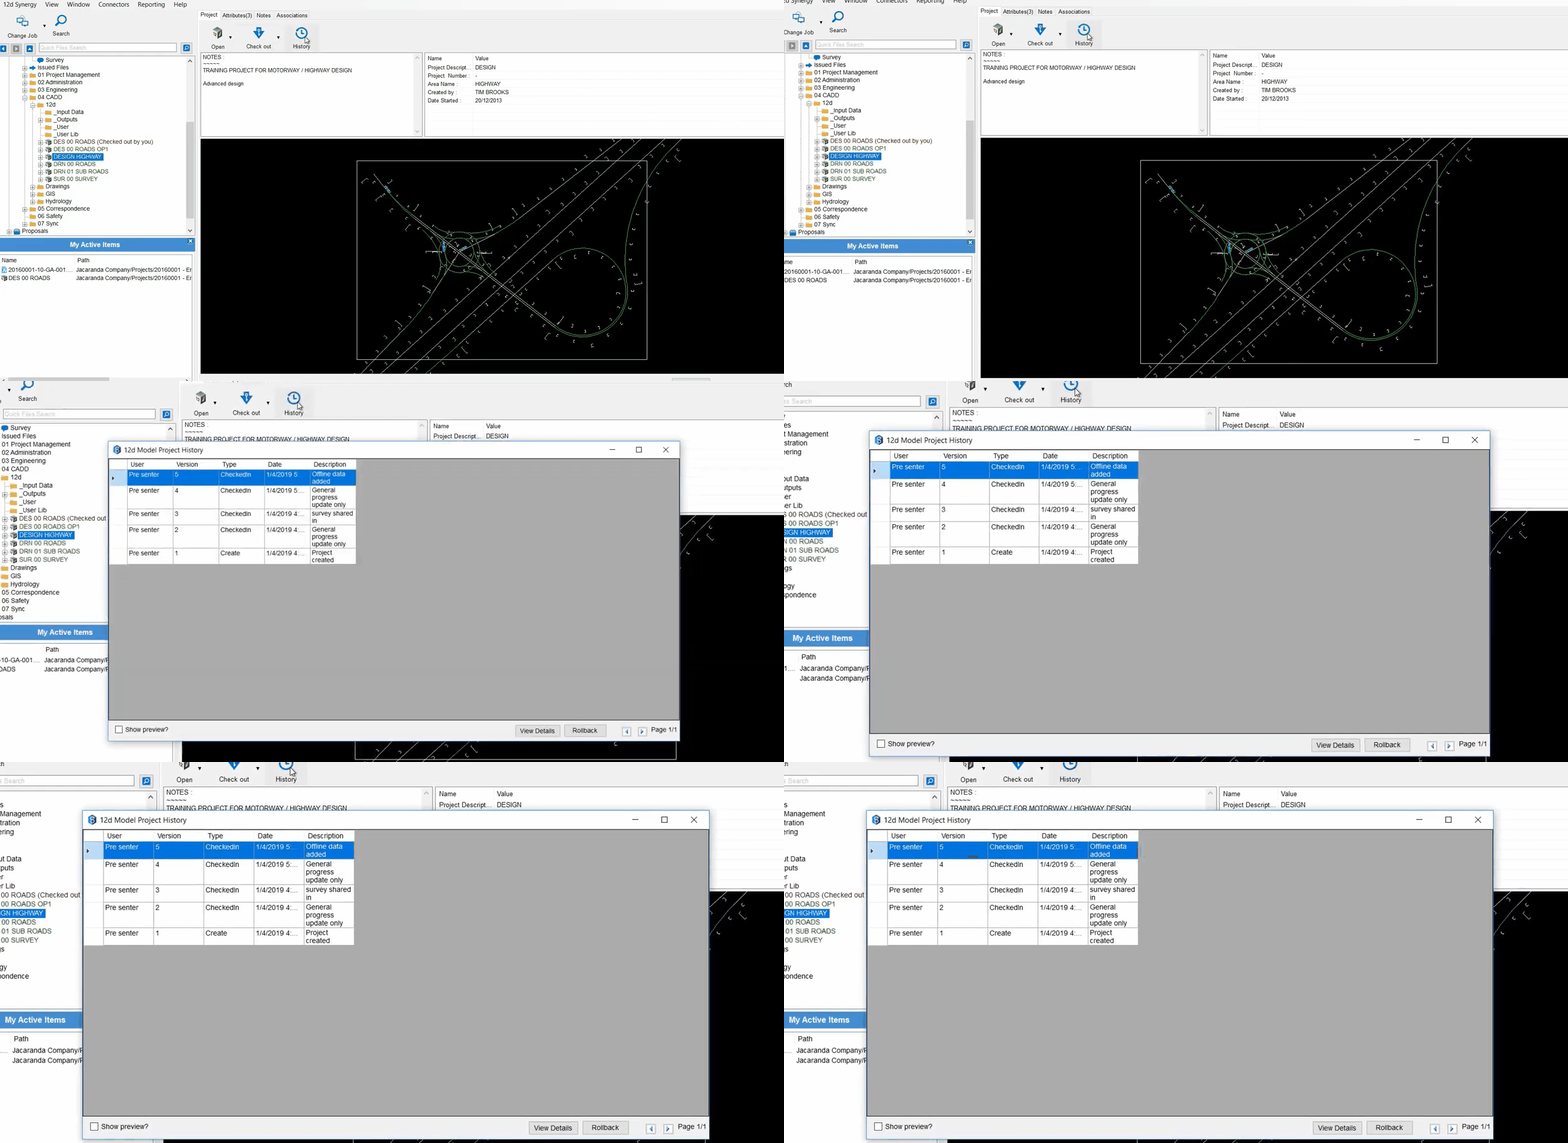
From here, you can rollback to a previous version by selecting the Rollback button in the bottom left corner of the History panel and selecting that previous file. (31:03)
Mission complete. You can now seamlessly integrate your 12d Model Project through 12d Synergy. Nice!
Continue to Part 3: 12d Model Administrator Integration with 12d Synergy
Want to continue your transition into a data management master? Click here to read part 3 of the series and learn about the administrator integration of 12d Model data with 12d Synergy.
12d Synergy: Step up to Superior Data Management.
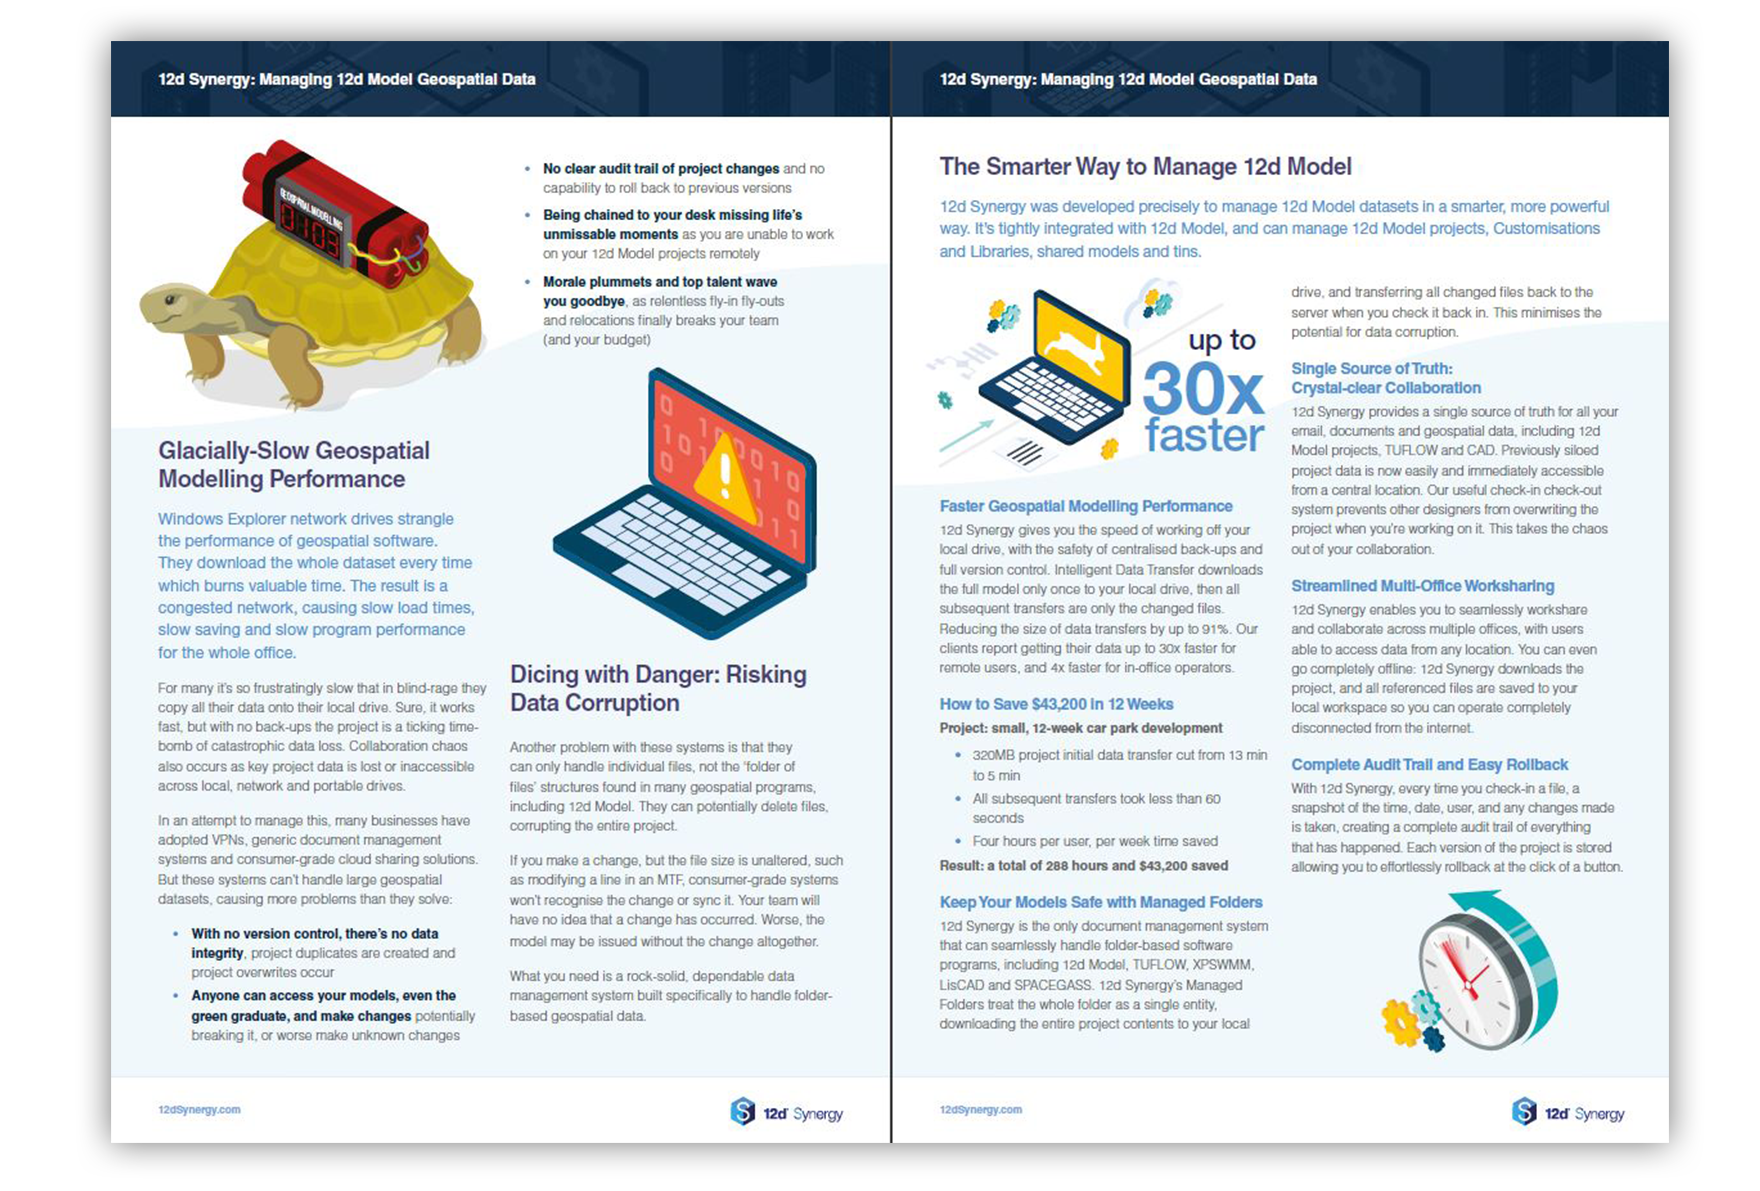
Find out more about streamlined 12d Model data management in our free eBook
Download Free eBook: Managing 12d Model Data

Author
