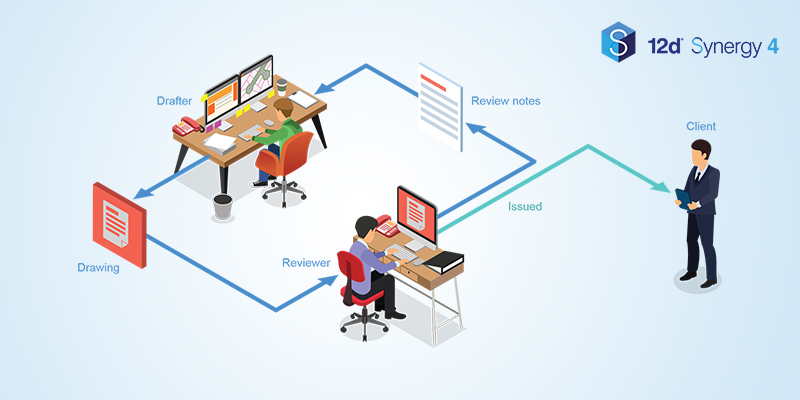
All businesses have a range of workflows. Some are highly efficient and optimised, others are error-prone, resource-wasting and frustrating. Poor workflows typically have too many activities, involve the wrong people, include the same people too many times or have too many potential rework events.
Improving them is critical: whether or not a project gets successfully completed to standard, on time and within budget hinges upon how well your workflows are designed, implemented and executed.
Poor Workflows Produce Poor Work – It’s As Simple As That
So how can you transform inefficient workflows into something productive and profitable? What do great workflows look like? What’s the process of designing them?
Extra Dimension Solutions’ Michael Behar answered all of these and more in his webinar: Designing Great Workflows. Find out the three universal components to creating world-class workflows, and how they could work for you.
Watch: Making Great Workflows – Industry Solutions Webinar Series
The Three Components to Designing Great Workflows
1. Map the Current Process
Start by drawing out the workflow – keep it simple, just pen and paper or on the whiteboard for now. Identify who starts the workflow, each activity, each potential rework event and who completes it. Mapping also helps with the implementation of a 12d Synergy workflow – which uses a similar flowchart-inspired visual design with boxes and arrows.
Michael recommends using a simple ‘swim lane’ diagram. Create a lane for each person, from the trigger that starts them, to the end output. It’s a great tool for seeing who interacts with whom, where bottlenecks occur and how many activities each person performs.
2. Determine Process Change Objectives
After mapping out your workflow, the next step is to determine the objectives of the workflow. This will direct your workflow creation process. Some of the common workflow objectives include: increasing productivity, shortening lead-time and reducing costs.
Some of the ways to achieve these objectives include: reducing cycle times (time taken for an activity), reducing wait times and reduce total number of states. For example, a workflow that involves team members manually saving updated project files can be sped up, and made error-free, through an automated, check-in, check-out system.
3. Analyse the Process
Next, analyse the performance of the workflow in meeting your objectives:
• What is the total lead time of this process?
• What is the total value-creating time for each state?
• What is the total value-wasting time for each state?
This helps you to determine whether there are any states that can be eliminated, which can greatly reduce lead times and complexity.
Streamlining Workflows with 12d Synergy
Once you have designed your world-class workflow, you need to implement, manage and execute it. 12d Synergy’s Workflow Engine is the perfect tool to do this, helping you to get back in control of your workflows by managing, streamlining and automating them. You can work smarter, focusing your time and energy on the tasks that actually get the job done, by:
1. Bringing visibility to your workflows
2. Ensuring all steps in a workflow are completed
3. Automating many workflow tasks
4. Enabling crystal clear collaboration
Setting up and running workflows is easy in 12d Synergy. Workflows can be as simple or as complex as you need, to seamlessly suit your business’s unique processes. And you don’t need to be an IT wizard – it’s simple drag and drop.
Mick has been an integral part of Fulton Hogan’s role on Sydney’s B-line project and was at the forefront of the adoption of 12d products on the project. Mick will take you through the benefits of using 12d Synergy and 12d View (within 12d Model) in a successful surveying and construction firm.
Want to learn even more? There’s a great upcoming webinar, 12d Synergy for Surveyors, presented by guest speaker Michael Connor of Fulton Hogan.

Author

